Showing posts with label recipes. Show all posts

Wednesday, January 7, 2015

DIY Family Recipe Book: Whole Wheat Bread

One of my favorite aspects of unschooling is the time I spend with the girls cooking in the kitchen. We have many family favorite recipes and this year I want to put at least 52 recipes into a Mohler Family Cookbook. The girls are excited and are going to help with the process!

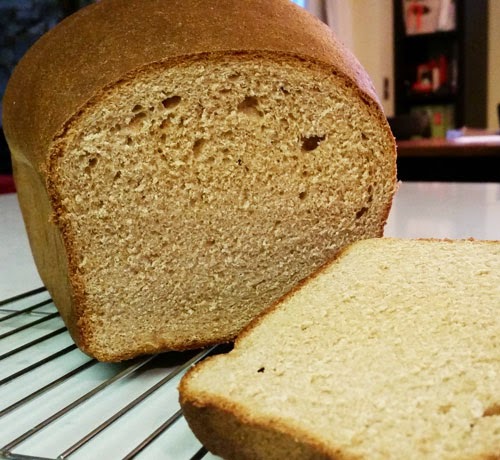
This week we are baking whole wheat bread. This bread is incredible and Olivia can now make it by herself as well!


I think the best lesson my girls learned through watching me bake bread is that failure is not an option. I guess you could say my bread baking skills were sub-par! Believe me no one in my house thinks my bread should be fed to our chickens. Actually I have listened to arguments over who will get the last slice!

This bread is made two or three times a week at our home. I hope you enjoy it as much as we do.


Ingredients:

Whole Wheat Bread Flour
Molasses
Sugar
Yeast
Salt
Vegetable Oil
Warm Water

Step one:
  • Add 3 ½ teaspoons of yeast, 2 tablespoons of molasses, ¼ cup sugar, 2 cups whole wheat bread flour, 1/3 cup oil, and 1 & 1/3 cup warm water into a mixing bowl.
  • Using the paddle attachment mix together for 5 minutes.

  • This will create a sponge. The sponge will need to be covered with a moist towel and allowed to rise for 60 minutes.

Step two:
  • Add 1 teaspoon of salt and 1 ½ - 2 cups of whole wheat flour to the sponge. Mix using the dough hook for 10 minutes.

Your dough should form into a ball. If you are impatient like me, do NOT cheat and try to mix for 5 minutes, or even 8 minutes. You will get the best results if you truly allow the mixer to knead the dough for 10 minutes.
  • Pre-heat your oven to 350 degrees.

Step three:
  • Roll dough into a log and place into a large greased loaf pan. Let rise for 30 minutes.

Step four:
  • Place loaf pan in the oven for 33 minutes. That is the magic number for my oven. J

Let bread cool on a cooling rack, or slice right into the warm bread and slather on the butter! Whatever floats your boat.

I hope you enjoy this recipe. It is a definite family favorite in our home.


Friday, January 2, 2015

Making the Perfect Pie Crust


This year we spent Christmas at the happiest place on earth! The girls have named this the BEST Christmas ever and I would agree. Yet, because of the traveling we missed doing some of our favorite holiday baking. Everyone at my house is thrilled that we are celebrating 2015 with homemade pie!

Perfect pie crust is a must and I am incredibly grateful that my grandmother taught me how to make an awesome crust! I no longer make it in a glass bowl with a wooden spoon, but after a few tweaks and a Kitchen Aid I can truly whip together pie crust in no time at all.


Ingredients:
·         2 cups all-purpose flour
·         ½ teaspoon salt
·         ¾ cup of butter flavored shortening
·         6 – 8 tablespoons of ice cold water

The KEY to making great pie crust is the ice cold water, so take a few seconds and put some ice in a bowl and add water to it before you start mixing anything else together. Trust me on this.


Combine flour, salt, and shortening into a mixing bowl and mix well with a paddle attachment on your Kitchen Aid mixer. It should be a crumbly consistency.


Place the dough hook onto your mixer. Turn the mixer on and begin adding 6 – 8 tablespoons of ice cold water. Allow the pie crust to mix until the dough forms into a ball in the mixer. The dough should NOT be crumbly, if it is add another tablespoon of water.


This recipe makes enough pie dough for two pie crusts.


Roll your dough out onto a lightly floured pastry cloth. Lay the rolled crust into the pie pan folding under any excess crust.


Your pie crust is now ready for your favorite pie filling. My family LOVES pumpkin pie, so our New Year’s Day will be celebrated with a slice of our favorite pie! Hope you love making pie crust as much as I do. Such a yummy way to kick off 2015.